
The Camp Flyers section on your Camps & Clinics page lets you post a flyer with up to 8 registration buttons under it. Use it whenever one camp or clinic has several sign-up links, like separate age groups or days of the week.
You only fill in fields: upload the flyer, then type a name and paste a link for each button. The layout, button style and spacing are handled for you, and it looks right on phones automatically.
Before you start
Have these ready:
- Your flyer as a JPG or PNG. A portrait (tall) flyer works best.
- The registration link for each option, copied from D-BAT Hub.
- A short name for each button, like "Register: Ages 9-11". Keep it under about 30 characters so it fits on one line on phones.
- Access to edit your website in WebKIT.
This walkthrough uses the D-BAT River Falls Fall Hitting & Fielding Clinic, which has one flyer and three age-group registration links. Orange boxes show where to click.
1. Open the Camp Flyers section
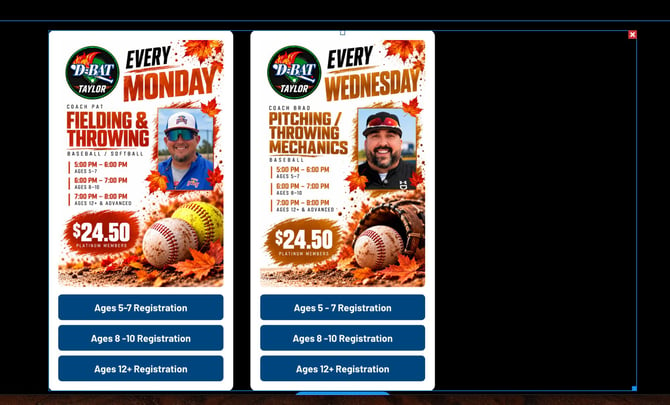
The flyer section is already on your Camps & Clinics page. In WebKIT, open that page and click anywhere on the flyers. In the toolbar that appears above them, click Content.
2. Pick a flyer or add a new one
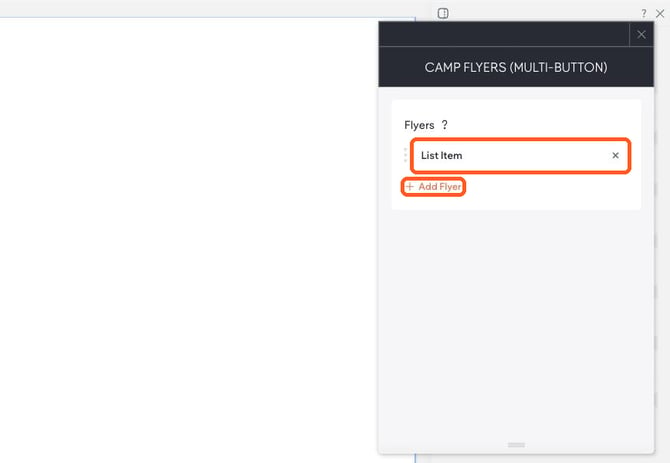
The Flyers list shows one item per flyer. Click an existing item to edit it, or click + Add Flyer to add another flyer to the page.
3. Add the flyer image
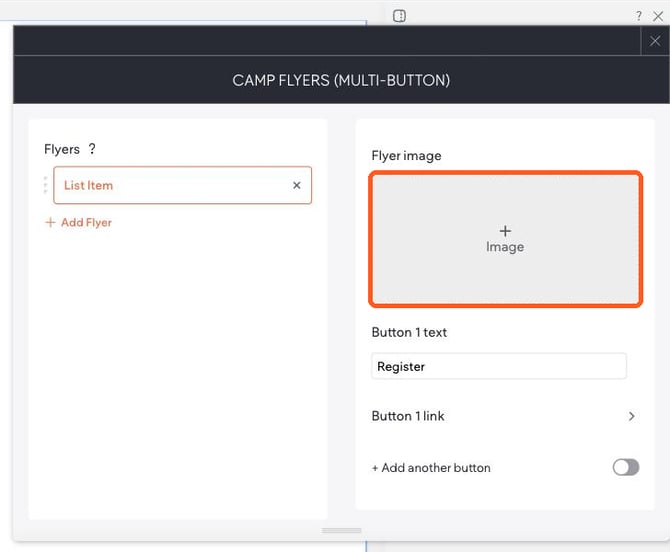
Click the Image box under Flyer image.
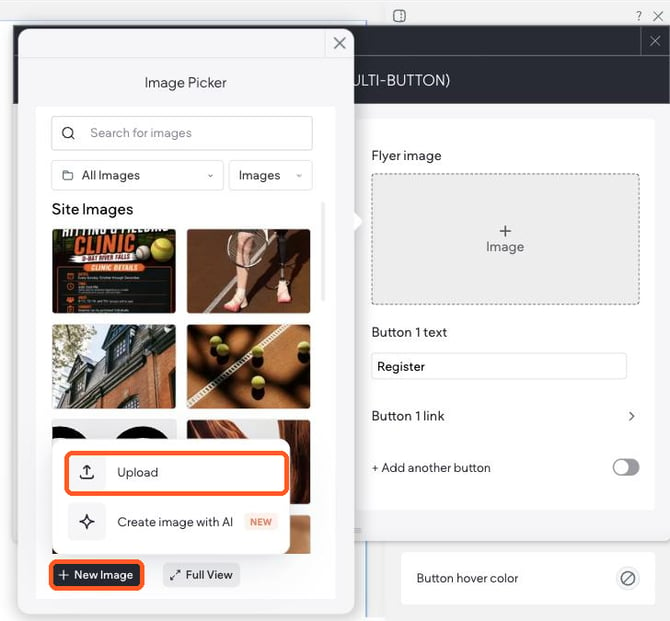
In the Image Picker, click + New Image, then Upload, and choose your flyer file. If you've uploaded it before, you can click it under Site Images instead.
The flyer appears on the page right away.
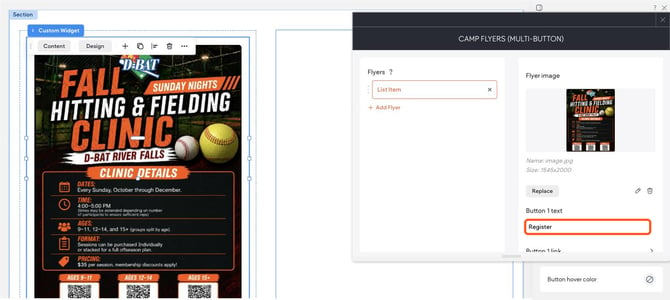
4. Name the first button
In Button 1 text, replace "Register" with what the button should say, for example Register: Ages 9-11.
5. Add the first button's link
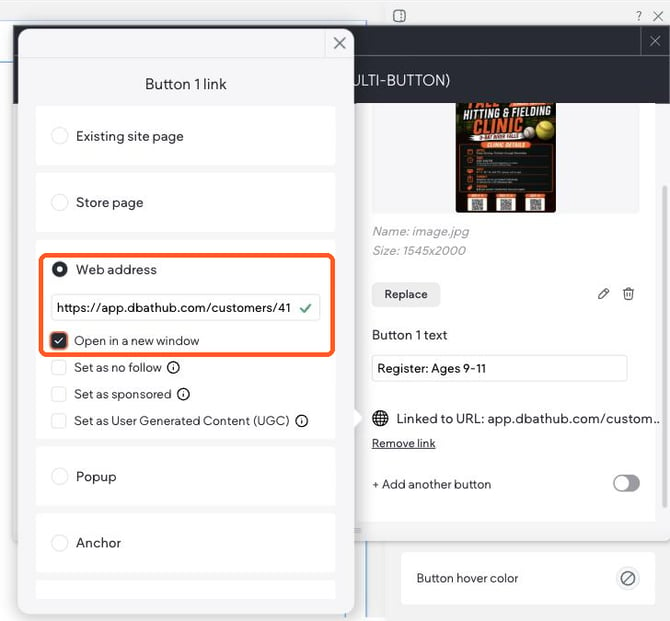
Click Button 1 link, choose Web address, and paste the registration link from D-BAT Hub. Leave Open in a new window checked. Close the link box with the X in its corner.
6. Add more buttons
Turn on the + Add another button switch under Button 1. Fields for Button 2 appear, plus another switch under them.
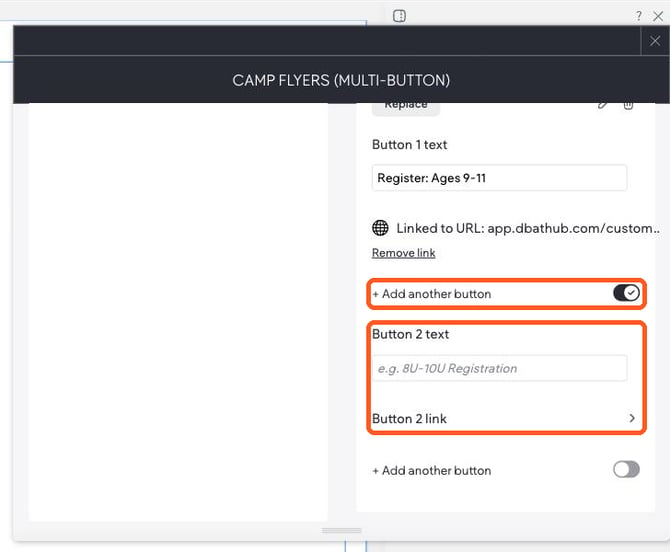
Fill in Button 2's text and link the same way as steps 4 and 5. Repeat for each registration option, up to 8 buttons. For this clinic, that's three: Register: Ages 9-11, Register: Ages 12-14 and Register: Ages 15+.
7. Check it and publish
Close the Content panel. Your flyer shows with its buttons stacked underneath.
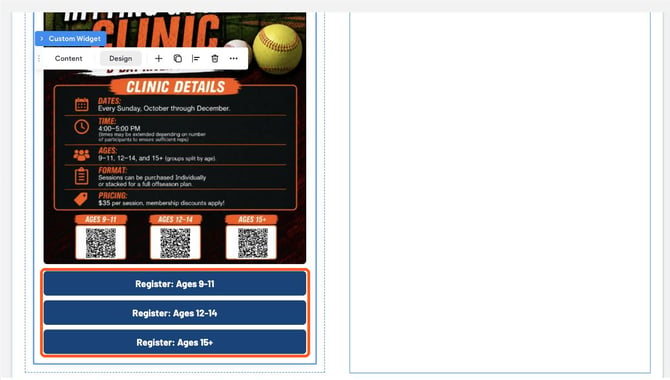
Click Preview (top right) to see it the way visitors will, then Publish so it goes live.
Editing or removing laterOpen the section's Content panel (step 1) and click the flyer in the Flyers list, then:
- Swap the flyer image: click Replace under the image.
- Change a button's name or link: edit its text, or click its link and paste the new one.
- Hide a button: turn off the + Add another button switch above it. That button and every button after it disappear from the page.
- Remove a whole flyer: click the X next to it in the Flyers list.
- Change the order of flyers: drag an item up or down by the dots on its left.
Publish again when you're done so the changes go live.
Tips and troubleshooting- A button isn't showing. Check that its text box isn't empty and that the switch above it is on.
- A button goes to the wrong page. Click its link and check the pasted address. Open the link in your browser first to make sure it's the right D-BAT Hub event.
- Button text wraps onto two lines on phones. Shorten it, for example "Ages 9-11" instead of "Register for Ages 9-11 Clinic".
- Need more than 8 buttons on one flyer? Split them across two flyers, or contact Upper Hand support.
- Changes aren't on the live site. Click Publish after editing. Changes stay in the editor until you do.