APPLIES TO: Admins
Last updated: Nov 5, 2025
Create a Retail Product
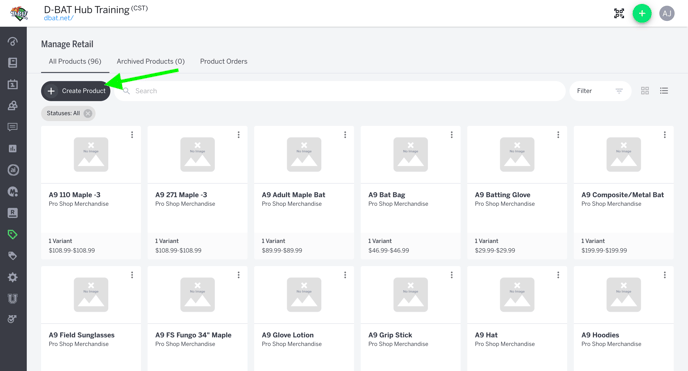
- After logging into your account, hover over the main navigation bar on the left and click Retail
- On the All Products tab click the black +Create Product button
![]()
- Next, enter the following information on the product page:
- Name: This will be the name that appears in the shopping cart when selling through Point of Sale.
- Price: The amount that you will be charging clients for the product
- Cost: The amount that it costs you to purchase the product
- Retail Vendor: Adding a vendor (brand) name to your retail products allows you to easily track and sort inventory by a specific vendor
- Retail Type: examples include apparel, concessions, equipment, etc.Next, enter the following information on the product page:
- Product Description (optional): Any additional information you would like to add to describe the product
- Product Tags (optional): Any categories your products fall under that will help you further organize and classify them
- Product Image (optional): Upload Product images to help visually identify a product and all of its variants
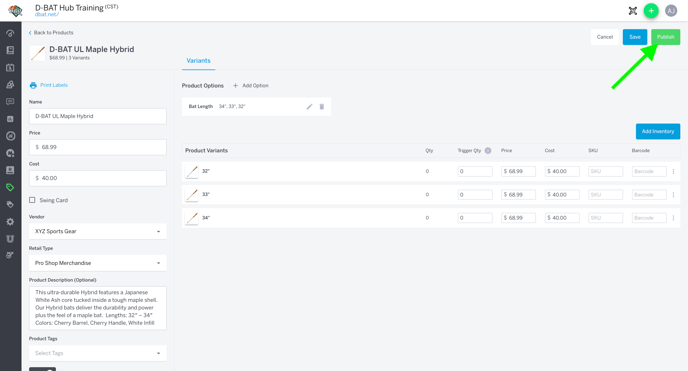
- Once all this information is entered, you can add product options or click the Create button to create your product
- Note: Product options can be added after product is created
- Once the product is created, you’ll see your product variants under the Variants section of the page
- Your saved product will default to status Unpublished status. This means it is not yet available for sale in POS. When you're ready to sell this product all you have to do is to click Publish when editing or use the 3 dot menu on the the product card to Publish.
Adding Product Options
Product options are how you establish the different variants (sizes, colors, patterns, etc.) of your product.
- Click + Add Option
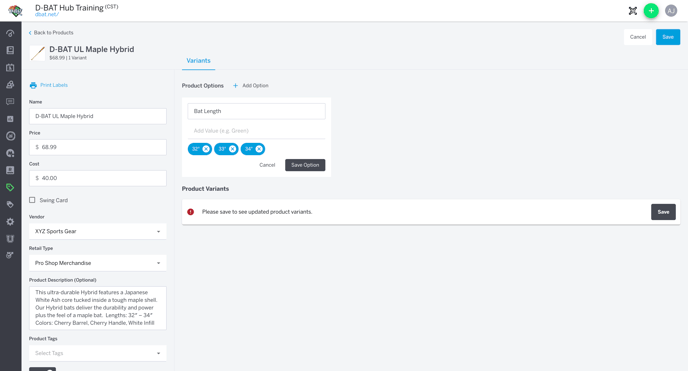
- In the Option text box enter your option name (ex: Color)
- In the Value text box enter your values (ex: Green, Red, Blue) and click the blue Add button to the right of the value or just hit enter on your keyboard
- Click Save Option in the bottom right hand corner of the modal to save your options
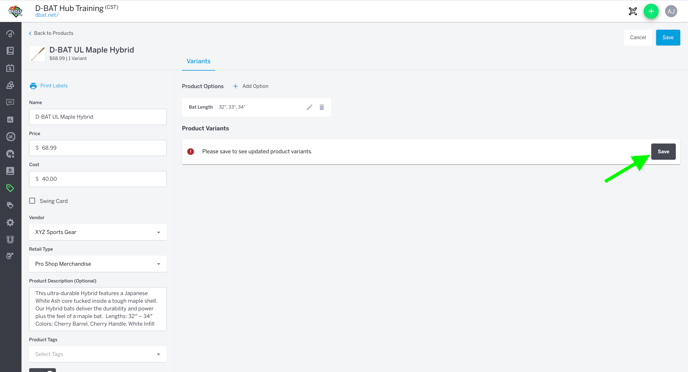
- Click Save under your variants list or at the top right hand corner of the product page
- See that your new variants are saved and listed under the Variants section
Adding Product Images
Adding product images is a great way to make sure you’re editing the correct variant and gives a visual aid to managing all your products
- Navigate to the Product Images upload section under Product Tags
- Drag and Drop your image or click browse to look through your images or files
- Select your desired image and click Open
- Crop the image to your liking
- Click Confirm to add the image to your product
- Repeat this process to add more images
- Note: To add specific image to a variant you can click on the default image next to that variant, select an image from all the images uploaded, and click Save.
- Once added you can click the star icon next to the image to make it your featured image. The featured product image is the image that shows when viewing the product on the All Products tab and in POS.
Adding Trigger Quantity
Trigger quantity is the number that the software will identify your product as low stock. Adding a trigger quantity for your product variants is optional.
- Click into the Trigger Qty. text box in your variant of choice
- Enter your quantity in the text box
- Click Save Product to save your trigger qty.
Adding SKUs
A stock-keeping unit (SKU) is used to keep track of inventory internally and can be specific to each business. Adding a SKU for your product variants is optional.
- Click into the SKU text box in your variant of choice
- Right click to paste your SKU in the text box
- Click Save Product to save your SKU
Adding Barcodes
Barcodes are used to scan products at checkout. Scanning or copying and pasting a product barcode in POS will bring up that specific variant, making it easier and faster to sell. Adding a barcode for your product variants is optional.
- Click into the Barcode text box in your variant of choice
- Right click in the text box to paste your barcode or use your scanner and scan the barcode on your product
- Once you see the barcode added, Click Save to save the new barcode